| 【1】
This customer customized feed clamp for 4 core plug.
We deal with american plug. |
|

|
| 【2】
Line was already cut off. |
 |
| 【3】
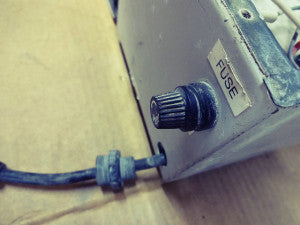
SC lock was out of place at the base of power in controller, fuse box was broken, couldn't detach it. |

|
| 【4】
This pic is SC lock was out place. |
 |
| 【5】
Couldn't detach fuse box. |
 |
| 【6】
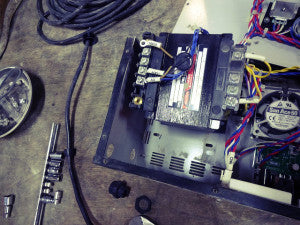
Opened controller. |
 |
| 【7】
Fuse box inside was soldered. Melt a solder, and detached. |
 |
| 【8】
Detached wiring of trans portion, and then detached power code. |
 |
| 【9】
Detached a broken SC lock. |
|

|
| 【10】
This pic is detached power code, and fuse box. |
 |
| 【11】
Install SC lock into controller, through power code,
applied to tie-wrap in order to prevent wire from slipping out. |
|

|
| 【12】
Attached tie-wrap portion with SC lock inside.
and adhered inside lock portion by melting it to prevent SC lock from being off. |

|
| 【13】
Replaced fuse box.
If it was attached with controller, it's hard to solder.
It's better to solder it outside. |
|

|
| 【14】
Solder was completed. |
 |
| 【15】
Back wire which was detached at 【8】 as it was.
Ground wire was going to controller box, applied loctite not to loose screw. |
|

|
| 【16】
Lock the SC lock, and put fuse into fuse box. then complete. |
 |
| 【17】
Controller box repair was completed. |
|
|
| 【18】
Slag inclusion was occurred inside 4 core plug of feed clamp.
Need to prevent leaking completely. |
 |
| 【19】
Dealt with end of wire with right size round terminal. |
|

|
| 【20】
Connected wire hard inside plug, tighten a bolt hard . |
 |
| 【21】
Made wire thicker by using tape to adjust plug's size. |
|

|
| 【22】
Sealed exit of plug wire by tape portion. |
 |
| 【23】
In addition, sealed from plug portion to wire portion double for water-proofing, fixed by band clamp.
Wire length was 5m in this time. |
|

|
| 【24】
Took out wire of DC motor from inspection window. |
 |
| 【25】
Took off wire, and cap of power code. |
|

|
| 【26】
Cut wire, and Took out wire. |

|
| 【27】
Condition without old wire. |
|

|
| 【28】
Attached cap of wire, ring, water-proof rubber with new 5m wire. |
 |
| 【29】
Inserted wire into DC motor box. Applied to tie-wrap in order to prevent wire from slipping out. |
|

|
| 【30】
Inserted water-proof rubber. |
 |
| 【31】
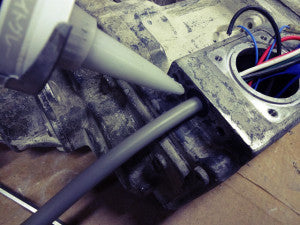
Applied silicon seal for water-proofing. |
|
|
| 【32】
This is silicon seal. |
 |
| 【33】
Attached ring with water-proof rubber, assembled body of cap. |
|

|
| 【34】
Silicon seal overflowed. |
 |
| 【35】
In addition, put silicon seal to wire lock portion. |
|

|
| 【36】
Made insulation process against unused 2 wires. |
 |
| 【37】
Connected 4 core wire by connecting sleeve. |
|

|
| 【38】
Applied grease to O ring of inspection window. |
 |
| 【39】
Put wire into DC motor box,
and then insert O ring to furrow. |
|

|
| 【40】
Set cleaned inspection window temporary. |
 |
| 【41】
Fixed inspection window. |
|

|
| 【42】
In addition, put silicon seal to wire entrance. |
 |
| 【43】
Complete!! |
|

|
| 【44】
2 feed clamps, and controller repair was completed. We always make a estimate in advance.
Please feel free to contact us. |
 |


